Saturday, June 12, 2021

Use Phone To Extend Wi-Fi

Wi-Fi extender helps to boost the weak signal and increase the signal. Similarly you can boost the weak signal with the help of your smart phone phone.


You can use the application called NetShare that will help you to increase the Wi-Fi coverage. 

For Android User

By default, Android devices don’t provide the functionality of a Wi-Fi repeater. This means that you cannot create two connections simultaneously. It is evident from the fact that if you have your Wi-Fi turned on and then create a hotspot connection, then the Wi-Fi would automatically get disconnected. This is where the NetShare no root tethering app comes in handy. It’s one of the best Wi-Fi repeater apps for Android. It will allow your Android device to act as a Wi-Fi Hotspot even when the device is itself connected to a Wi-Fi Network. As evident from its name, the app doesn’t require a rooted device.

In a nutshell, this is how the app works. It will create a new workgroup and subsequently a Virtual Private Network on the device connected to the internet. Now the other device, after entering the Proxy settings, will join the workgroup of the first device. This way the app is letting all the internet traffic of the second device pass through the first one. To try it out, follow the below instructions to make your Android device act as a Wi-Fi repeater.

Instruction for setting up the NetShare

 To start Netshare 

  1. Install NetShare app in the device
  2. From the main screen tap on the START  

To connect from the android mobile

  1. Install NetShare app in the device
  2. From the main screen tap on 'CONNECT' and wait until the app connects
  3. If VPN request permission open please click ok.


To connect from the windows

  1. Connect to the wifi 
  2. Go to the control panel and internet option click on the connection and LAN  Settings
  3. Check the box of use proxy sever for LAN 
  4. Put the address 192.68.49.1 and port  8282 and click apply and ok.
You can see instruction through this official link   https://netshare.app/android

Friday, May 28, 2021

How to recover the deleted vsftpd configuration file

Solution to recover the deleted configuration file of vsftpd


While learning to the server configuration you have to write many code to the configuration file in linux server. It is better to do backup before editing the configuration file. But sometimes we forget to do back up the configuration file and start configuring and cause to an error and we need to get the default configuration file  or somehow it get deleted .

To get the configuration file of ftp server i.e vsftpd.conf file back you have remove the vsftpd and install again.

To remove vsftpd

sudo apt-get remove vsftpd --purge 

To Install vsftdp

sudo apt-get install vsftpd


Note : Simply removing and installing again does not recover the configuration file .

Sunday, May 16, 2021

Five Ways to open CMD Command Prompt with admin previlages


The slow way to open this essential power user's tool is to dig through the Start menu (Start > Windows System > Command Prompt). Here are a handful of faster ways that also give you control over startup folders and whether you run the command session as an administrator.

1.Right-click Start and choose Command Prompt or Command Prompt (Admin) from the Quick Link menu. You can also use keyboard shortcuts for this route: Windows key + X, followed by C (non-admin) or A (admin).

2.Type cmd in the search box, then press Enter to open the highlighted Command Prompt shortcut. To open the session as an administrator, press Ctrl+Shift+Enter.

3.From File Explorer, click in the address bar to select its contents; then type cmd and press Enter. That opens a non-admin Command Prompt session in the current folder.

4.In a File Explorer window, hold down Shift as you right-click on a folder or drive. That opens a non-admin Command Prompt session in the selected location.

5.Type cmd in run command box, then press Enter to open the highlighted Command Prompt shortcut. To open the session as an administrator, press Ctrl+Shift+Enter.

If you're a PowerShell user, you can open a Command Prompt session from PowerShell by typing cmd and pressing Enter. To return to PowerShell, type exit and press Enter.

Friday, May 14, 2021

How To Start WIFI Hotspot or Hostednetwork Using CMD

Hotspot is created using wifi. The hotspot provides internet to wireless devices by using wifi. A hotspot is created using an access point device, but in normal use, a hotspot and an access point can mean the same. An access point is usually connected to a gateway or router, that is connected to the Internet. Hotspot are less secure than private wifi because they are commonly used in public places.

There is two ways to enable hotspot in windows 10 
1. Using GUI interface 
2. Using CMD

  • Open the cmd with administrate privileges and type the following command there.
  • netsh wlan show drivers- this command helps to show about the wireless driver installed in your computer.
  • netsh  wlan set hostednetwork mode=allow ssid=[your wifi name] key=[your password] and hit enter
  • netsh wlan start hostednetwork

[ 
Note :For understanding the code you typed in command prompt
netsh stands for network shell 
set hostednetwork mode=allow helps to allow or disallow the hostednetwork 
ssid for your wifi name 
key for the password  
netsh wlan start hostednetwork- this will start the hostspot 
]

Connect to the wifi using password you have kept , You will get connected to the wifi
but you will unable to surf internet through which you have connect so  you have to share the wifi connection through this network which you have just created. To do follow the following process.

Open adapter setting and right click on the wifi and click on the properties and goto the sharing tab 


Tick to allow other network user to connect through this computer and select the adapter which has just been created and then click ok.

Wednesday, February 24, 2021

Find Details About Your CPU In a Minute

It's hard to find the details of the CPU  and Memory because it needs lot of effort to know details through your command prompt and power shell and system settings.
But Computer Developers have developed different application which provides the core information about system.
To know the details simply Download CPU-Z which is executable in windows and provides all the information about you system.


You can detail about CPU , Mainboard , Memory as well as Graphic in your system.

Tuesday, February 23, 2021

Best Flash Drive That you Should Buy!!!!!!!!!!!!!

When you think  to buy Pendrive or Flash drive then you want to buy best among all other in budget. 

There may arise few question in your mind that what makes the pendrive or flask drive  best.


There are lot of things that must be consider while choosing the best pendrive to buy i.e. storage , chipset , data transfer , durability and the price .

So  I have found the some of pendrives that are best to use for personal use in long term. 

1.Patriot Supersonic Rage 2 USB flash drive

    If your flash drive needs demand blazing fast speeds, then one of the best USB flash drives to consider is the Patriot Supersonic Rage 2 is definitely the one for you. Sure, the price is high, but we were blown away with just how fast this device is. If you need to move around large files quickly, then this is definitely worth the cost.

It also comes with 128GB of storage space, which is a phenomenal amount to carry around in your pocket. Just make sure you don't lose it! 

It is the best one but unavailable in Nepal.

2. Kingston Technology DataTraveler 

At times, when purchasing a USB flash drive, the cost of postage and packaging actually constitute more of the price than the USB stick itself. However, the Kingston Technology DataTraveler 100 Generation 3 is incredibly compact and an affordable drive that is more than worth the cost of shipping. This flash drive is the most affordable 64GB USB 3.0 drive on the market, touting read/write speeds of 150Mbps and 70Mbps respectively to make it worth every cent.


3. SanDisk USB flash drive

The brilliantly priced SanDisk Extreme CZ80 is among the best USB drives, as it offers plenty of storage space and fast file transfer speeds. Be prepared to be impressed as while it’s priced more towards the budget end of USB sticks, its performance is anything but budget. This one’s is a speedy little performer. 

Plus, the slide-out design of this stick means you can tuck the USB interface into the body when not in use, protecting it and minimizing the risk of it getting damaged when you're carrying it around.


4.Transcend

It is the most selling pendrive in bangladesh due to most affordable in budget comparatively to others but it is slower than all other listed usb pendrive.


5. All other company Pendrive


All other company pendrive are cheap but they are not reliable compare to above listed pendrive and can be damaged at regular used or if u want to change the filesystem of the pendrive while formatting .

Friday, February 19, 2021

How To Make Bootable Pendrive

Now a days it hard to find windows installation media in CD . So we have another options that is usb drive and to use usb drive as windows installation media its should be made bootable.


Before making Usb-drive to bootable Usb drive we must have knowledge of partition and file system which are used in  desktop as well as laptop.


Requirements
1. Pendrive greater thean 8 gb
2. Rufus software 
3. windows iso file 


Step 1. You have to get the windows iso file or you can download file from the internet.
Step 2. Download Rufus software from the internet and install the latest version.
Step 3. When you insert the usb drive , Rufus software will detect the drive and  you will get options to select windows installation file as shown in the figure .
Step 4. It will automatically detect the partition scheme and file system but you should know which partition scheme you are going to use  in your pc or laptop.
Step 5. Click on Start to start the process and wait until the process ends.
Step 6. Eject the usb drive and then insert  into the another pc to which you want to boot.

Friday, October 9, 2020

How to share your wifi internet connection to another computer with ethernet cable

 Step 1 : Goto Run command dialogue box  by pressing key Win + R


Step 2 : Type  ncpa.cpl and hit enter to open network connection as shown in above figure.

Step 3 : Select the wifi and right click on it and goto its properties.

Step 4 : Click on the sharing tab and then click allow and select the ethernet in home networking dropbox. 


Tuesday, August 25, 2020

How To Delete Pages In Word

 Microsoft  word is commonly used for the editing and formatting the text and document.People feel hard to delete the blank page and whole page at once.

There are three ways to delete the pages in the Microsoft word .

First one : Using Backspace 

Second one : Using Goto page

Third one : Using Navigation Pane

I think there is no need to explain using the backspace.

Using Goto page----->  Find the page you want to delete and click on that page and Use the shortcut key ctrl + G to open goto dialog box and type  all shown in red color    "\page" and hit enter .

You will see that all the text in particular page will be selected and hit delete to delete the whole page.

It seems like selecting whole text in that page and deleting but it is slightly different from that one because it does not effects ur format of the page.

Tuesday, August 18, 2020

How To Add FM/Radio Into Your Blog

There are different ways to add the FM or Radio station in to blog and website.There are alot of plugins available which support to podcast your Fm or Radio station in your web-page.

  One 

Step 1: Find the embedded code for the radio station or Fm station from the google or any search engine. Step 2: Goto the page layout and add gadget and click on Html/JavaScript and paste the embedded code there and save it and refresh the page. 

  Two 

If you do not find the embedded code for the Radio station or Fm then you have to create the embedded code for particular station.

Step 1: You must find the website where you can play that station and then extract URL form the website from that web-page. 
Step 2: create the embedded code for extracted URL with the help of embedded code generator which you can get easily on google or you can try at Embedded Code Generator
Step 3: Copy the code and paste it where you want to display Radio station and FM station 
Step 4: Now refresh and play.

I have created embedded code for the Ujjyalo Radio Network. You can simply copy and paste this code on your blog or web-page.

<audio width="300" height="48" controls="controls"><source src="http://node-21.zeno.fm/h527zwd11uquv?rj-ttl=5&rj-tok=AAABdAGAqAcAy6dlzsqJEV34-Q" type="audio/mpeg"/>Your browser does not support HTML5 audio. Please update your browser to view this media content.</audio>

Top Five Browser

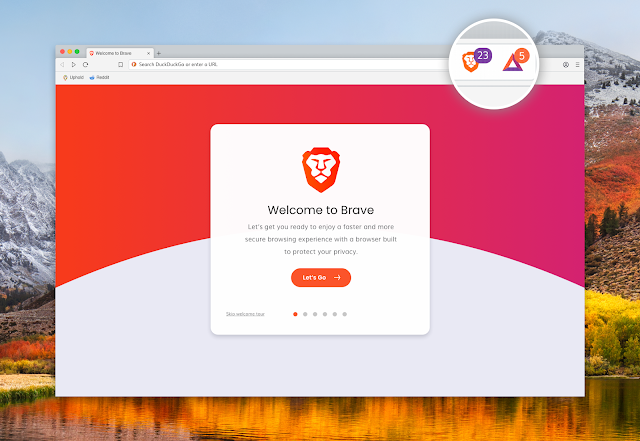
1 . Brave Browser Brave  Browser   is one of the best browser in the list even it is similar to all other browser because it has one of ...